Why
- Better file organization than the default way (files managed by Xcode UI/
xcodeprojfile) xcodeprojconfigs are done with Xcode UI rather than specified in a file directly- which → changes to
xcodeprojis less predictable & prone to merge conflicts
- Easier modularization than the default way (targets & dependencies managed by Xcode UI/
xcodeproj) - When code is modularized, better separation is enforced & it’s easier to avoid unnecessary dependencies
- Easier to reuse a module between different apps/projects
Initial setup
- Start a new project in Xcode (check create Git repository)
- Top bar menu: File → New → Package
- Set type as
Library - Set the location to be inside the project folder
- Set “Add to” to the project
- Uncheck create Git repository (because the project already has Git)
- name it
Appor something → Create
- Go to target setting of the top level app target, inside
General→Frameworks, Library, and Embedded Content, click+and include the package just created.
- Drag the auto-created boilerplate files (e.g. ContentView.swift, ___App.swift) into the
Source/Appfolder in the package
- Build & run 🎉
On going development
- If necessary, do some of the modifications in the Package.swift file
- Specify min iOS version on the top level in
Package, e.g.platforms: [.iOS(.v15)], - If an external dependency is necessary:
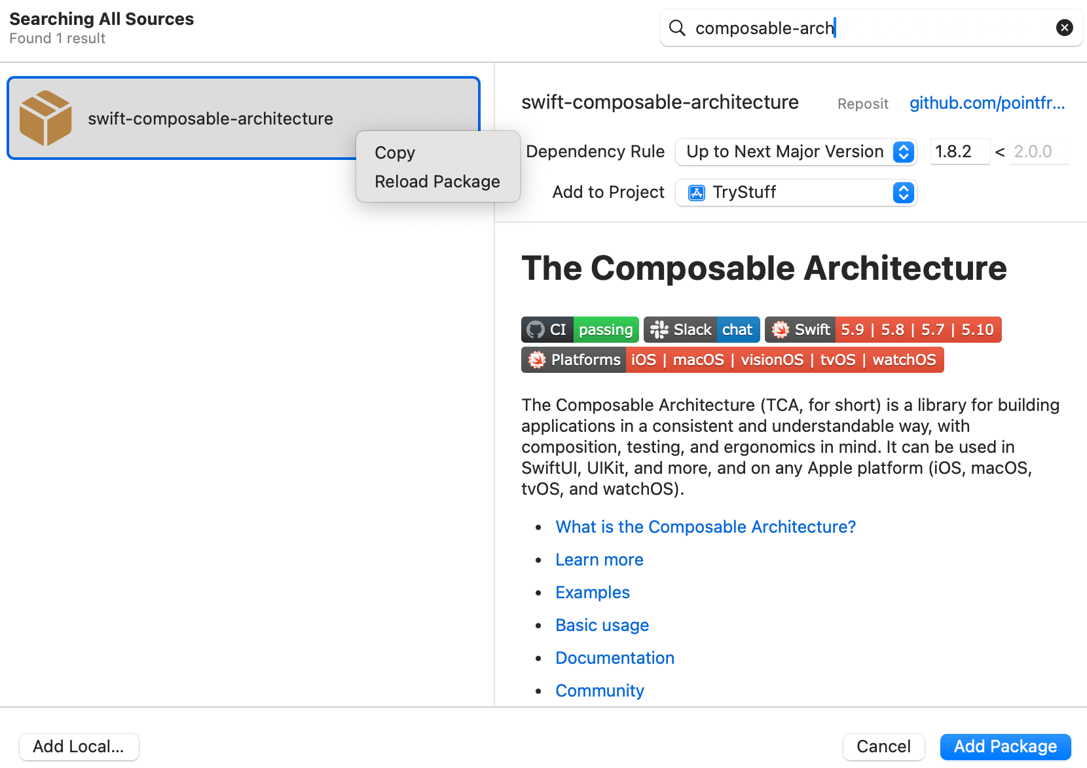
- Top bar menu: File → Add Package Dependencies
- Search for the package
- Dismiss the window (don’t click “Add Package” button, because we want the package to depend on this library, instead of the Xcode project)
- In the Package.swift file inside App folder
- inside top level
dependencies, add:.package(url: "<pasted github url for the package>", from: "<version seen from search result>"), - inside
targetsarray, for theApptarget (or any target that needs the dependency), in itsdependenciesarray, add:.product(name: "<library name>", package: "<package name>"). - package name is often the same as the git repository name
- the library name can be found in the
Package.swiftfile of the downloaded library. It’s also the name that will be afterimportin the code.
From the search result, check the current version, then right click on the package and & copy
Example:
- To add a new module
- create a new folder inside the package’s
Sourcesfolder - In the Package.swift file, inside
targetsarray, add a new target for this folder. - If the folder is on the top level, making sure the folder name is the same as the target name is enough
- otherwise use
pathproperty to specify the path - Include this target in the
dependenciesof another target that uses it. Can just include a string (target name) there.
- To add a new module that is reusable for other apps
- Similar to the initial setup of the
Appmodule, create a new module from top bar menu: File → New → Package - can check “create Git repository”
- This way this new module is its own package and will have its own Package.swift
 Made with Bullet